|
HKS ALC & ALC-II Installation |
Article Date: 01-27-05
Author:
Twisted
Six
Mod Class: Z32 NA or TT w/ Auto Transmission
Mod Type: Electronic Upgrade
Article Origin: Zmods.org
Difficulty Level:
2
(Scale of 1 to 10. 1 being extremely easy, 10 being extremely
difficult.)
Estimated Time to Complete: Less than an hour
Tools Required:
10MM Socket with 6" extension |
A rule of thumb to live by:
ANY TIME you work with something electrical on your Z, DISCONNECT THE BATTERY!
This will avoid ruining any electrical systems from accidental shorts and so on.
Now that you've disconnected the battery, we can begin! :)
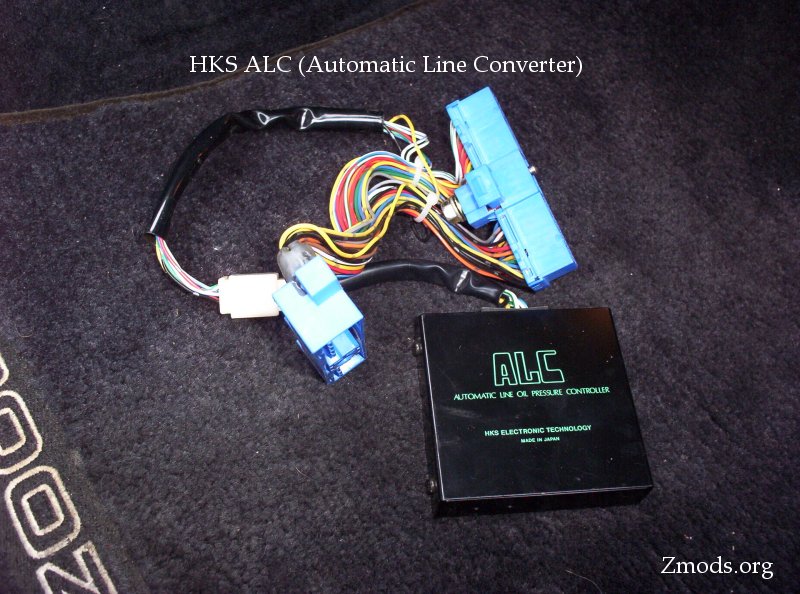
This writeup covers the installation of the HKS ALC. It doesn't matter if you have the
ALC or the ALC-II, they both install the same way.
This really a simple thing to install, but there are a few
areas where it can be tricky. The entire install process took about 30
minutes.
STEP 1 : Disassembly
1) Disconnect battery.
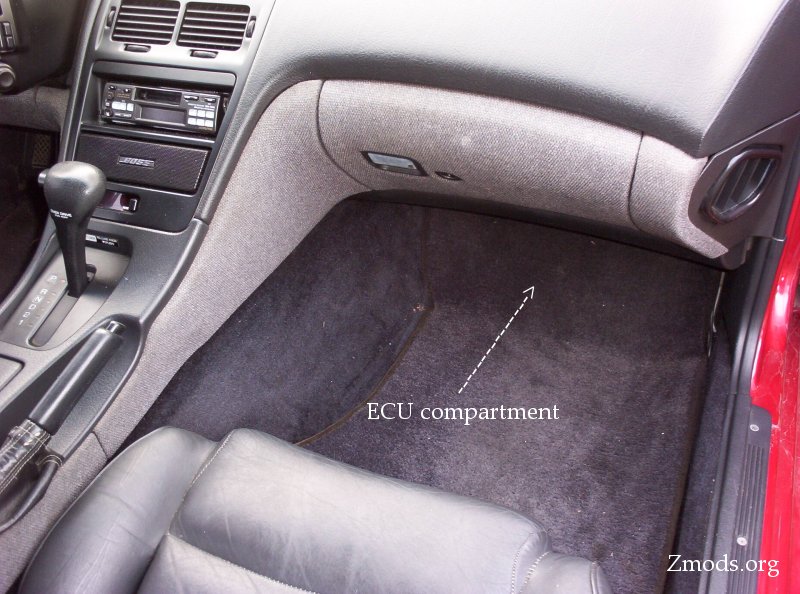
2) You need to gain access to the ECU compartment, under the passenger side
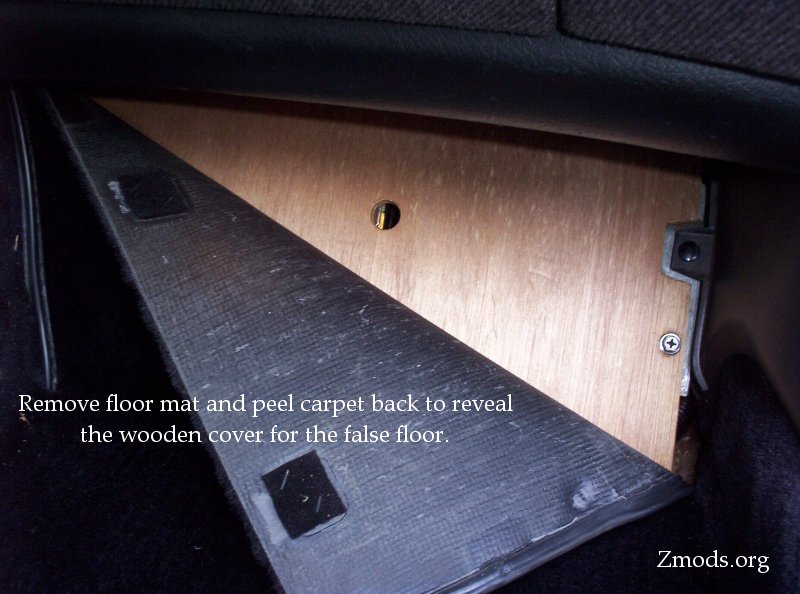
floor. Remove the floor mat and peel the carpet back which exposes the
wooden false floor.
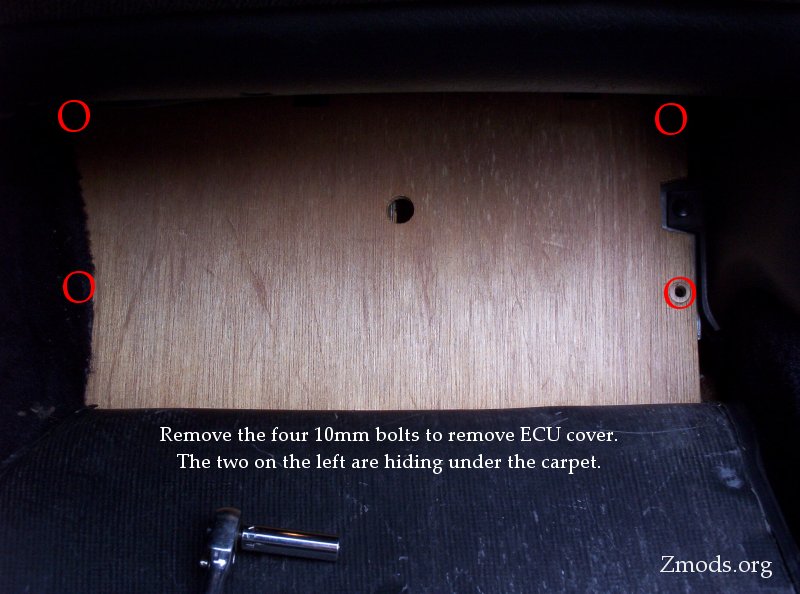
3) Remove the four 10MM bolts holding the wooden cover in place.
Then lift the wooden panel out. Pretty simple, HUH...
STEP 2 : Removing the harness
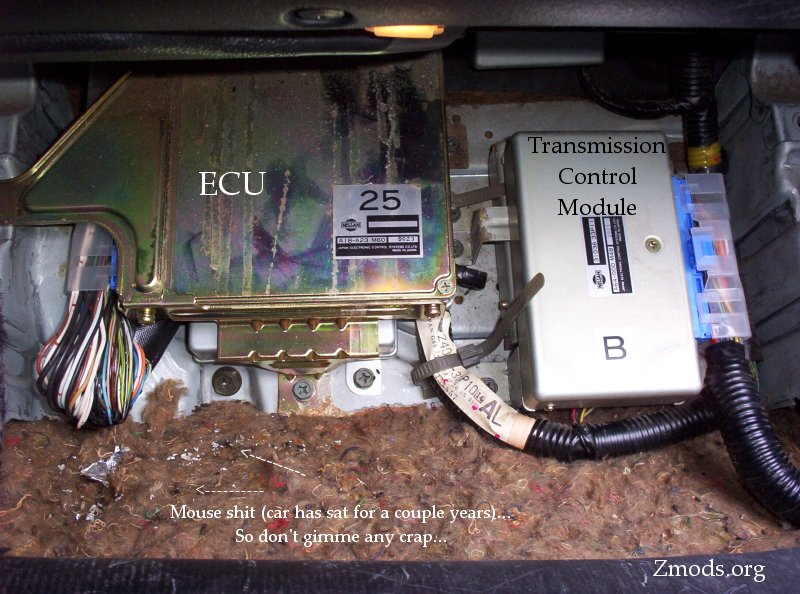
Once the wooden cover is removed, the ECU and TCM
(Transmission Control Module) are exposed. The ECU is on the left, TCM on
the right.
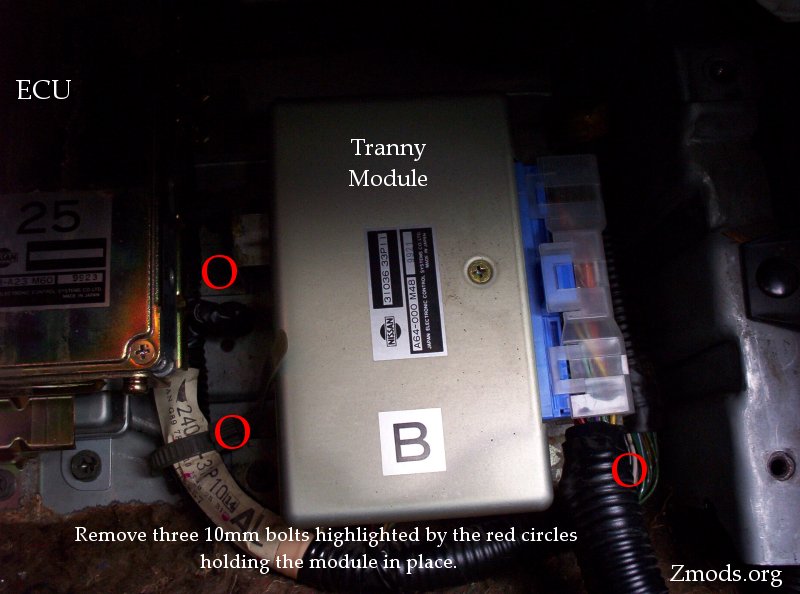
1) Remove the three 10MM bolts holding the TCM in place (as
indicated in the pic below). The one bolt on the right is under the
harness. Be very careful not to damage the harness removing this bolt, its
a tight squeeze in there.
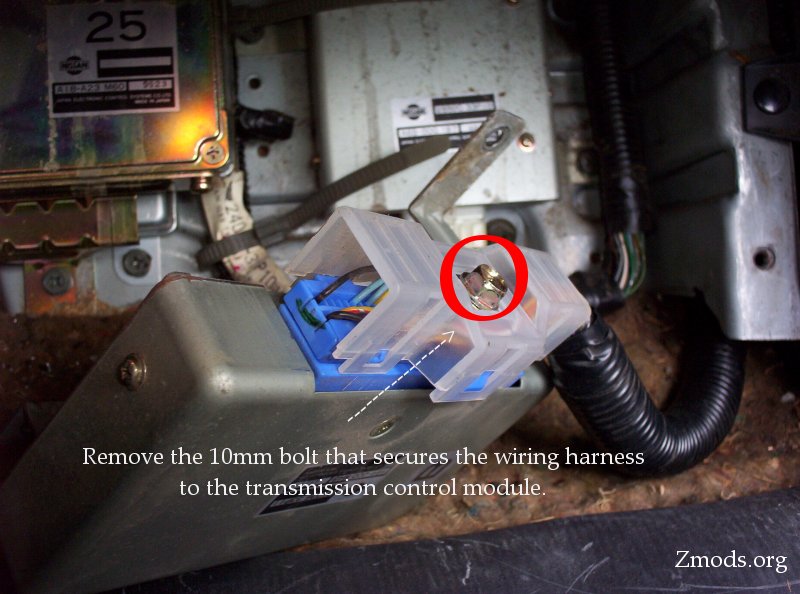
2) Now that the TCM bolts are removed, the TCM will lift out of
the compartment. The harness has quite a bit of length on it, so you'll
have room to move it around and into the open. Now you must remove the
harness connector from the TCM as shown below. MAKE SURE you're turning it
counter-clockwise to remove it! You do NOT want to tighten it! Over
tightening can damage the connector!
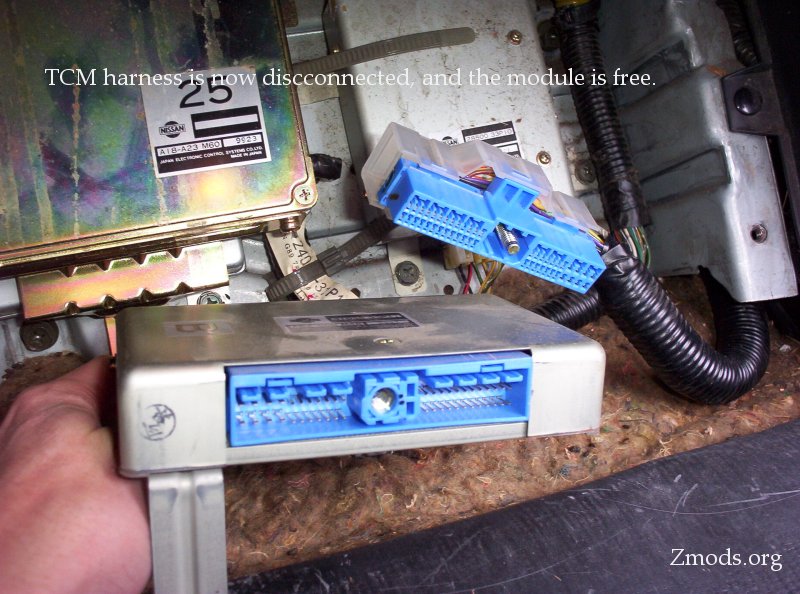
Once removed, check the connectors for any corrosion, damage,
and problems. If nobody has messed with this before, you shouldn't have
anything to worry about. If you do find corrosion, clean all the contacts
thoroughly. We can now begin on the actual install.
Continue on Page 2
|