|
STEP 3 : Installation
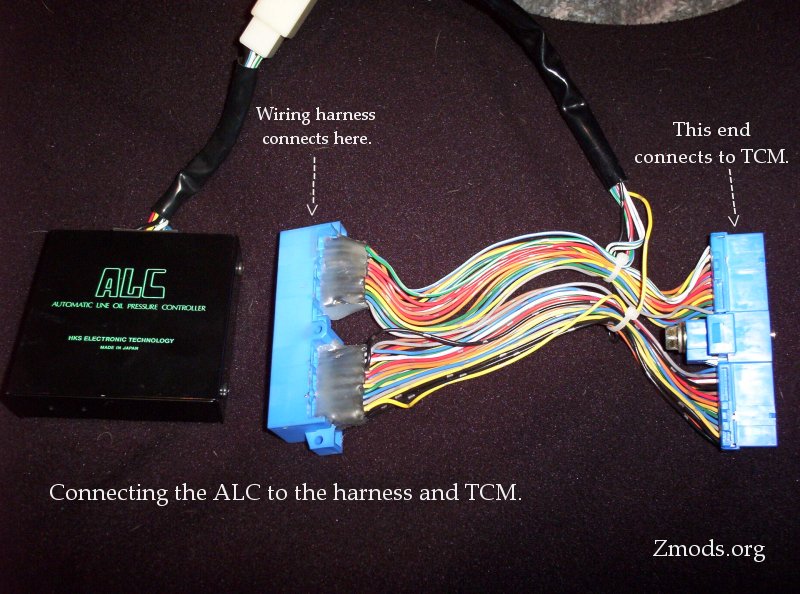
1) You can see from the image below that the ALC harness
connectors go inline between the factory harness and the TCM. Connecting
these is where it can get a little tricky. Don't worry about plugging it
in wrong, that is not possible, as the connectors will not mate up improperly.
If you are trying to connect it wrong, you'll obviously figure that out when you
try and realize the connectors will not fit. Only the correct connectors
will fit together.
2) When connecting the harness to the ALC connector, and the TCM
to the ALC connector, you need to be VERY careful when tightening the bolt.
As you turn the bolt in, it draws the connector tight. Tighten this VERY
slowly. About half-way through, wiggle the connector down a little,
insuring that it's traveling freely.
3) Now go ahead and snug it down, making sure that both sides of
the connector are aligned and firmly seated. DO NOT over tighten it!!
Once you feel the tension, and the connectors are seated, just lightly snug the
bolt!! Too much tension will break the connector, and cause the ALC and
TCM to malfuntion.
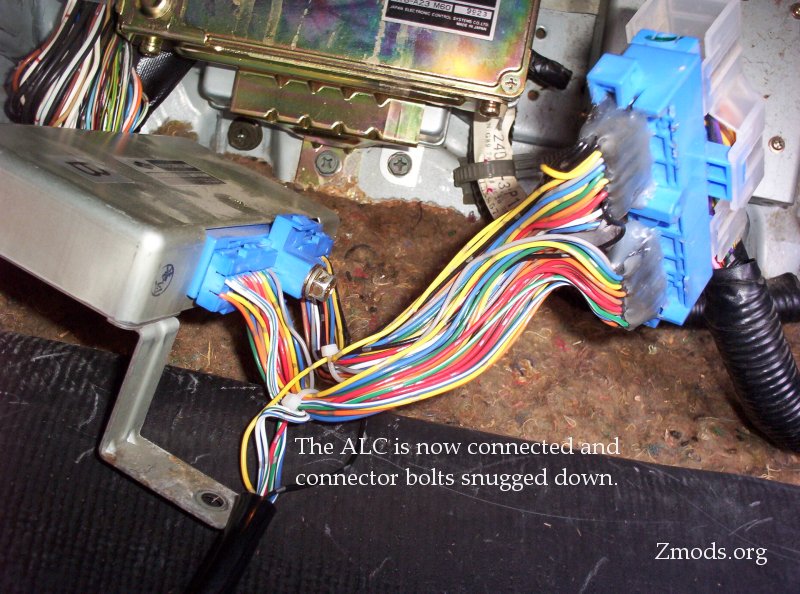
Once you complete these steps, the ALC is now connected and
ready for the first round of testing.
STEP 4 : Quick Testing and verifying the install.
1) Double check all your connections, leaving everything loose.
2) Connect a jumper wire from the TCM to the car body. The
TCM gets its ground through the car body, so it needs to be grounded for testing
since it's still sitting loose. Connect one end of the jumper to the metal
stand on the TCM. Connect the other end to the ECU's metal stand, making a
good connection.
3) Reconnect the battery.
4) Turn on the IGN switch, but don't start the car. Look
at the ALC and verify that the green POWER LED has illuminated.
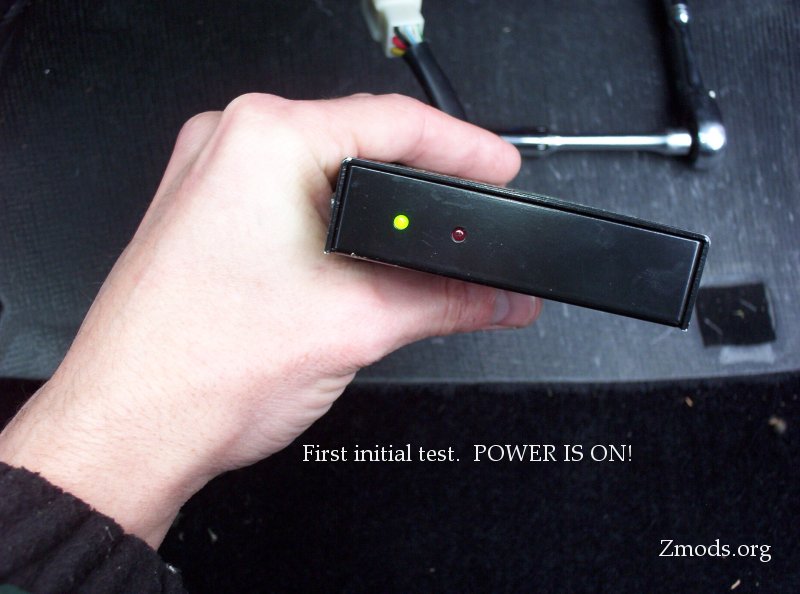
5) When the power LED comes on, the first test is successful!
Leave everything laying loose and start the car.
6) Start the car and let it run in park for a few minutes.
This will allow the ECU to reconfigure itself from the reset. (idle might be
erratic for the first few minutes)
7) Now it's time for the first road test. Get into the
street, with the OD switch in the 'OFF' position.
8) Take off at a normal driving acceleration, up to about 45MPH.
Make sure it shifts though gears 1, 2, and 3 smoothly. If you look at the
ALC, you will see the red LED flicker and illuminate as a shift is being
initiated.
9) From your 45MPH run, remove your foot from the gas and note
the downshift. If the tach drops to idle RPM and feels like it has shifted
into neutral, check your connectors for over-tightening of the harness. If
all is well, the tach will remain at speed, being locked in 3rd gear.
10) Now hit the brake and come to a stop. Once again,
watch the downshifts.
11) Go to a strip of road where you can get up to highway
speeds. With the OD still 'OFF', accelerate to 55MPH, and hold there for a
couple seconds. Then switch the OD button to the 'ON' position. The
car should then shift into overdrive, you'll feel it, and notice the RPM drop on
the tach.
12) If all goes well, the operation was a success. If you
have extremely hard shifts, or its not shifting at all, likely, you
over-tightened the harness. If thats the case, repeat
STEP 3.
13) If all went well, park the car, shut it off, and continue on to the final steps.
Continue on Page 3
|